Real 3D Sphere with bloom effect using frame buffers.

Hello ,
Up to date i know how to create 2D bloom effect with 3 Frame Buffers and a Mesh.
Where on the top i put the original texture, second horizontal blur third vertical blur and then render it to texture on 2D Mesh (inside the 3D world of course).

My result :

Now i want to use same technique or other technique to render bloom effect on 3D Sphere which is built from x triangles .

Now i understand that this effect applied only in the frame buffer world/limits , i cant create x mesh’s/frame buffers and draw them as 3D Sphere
Not to mention that the effect wont be look real in 3D because it exist only in this square frame buffer .

How it is done ?

Thanks !

Bloom is normally implemented as a post-process effect using high dynamic range (HDR) rendering.

With HDR, rather than the framebuffer containing gamma-corrected brightness values with 8 bits per component, it contains linear intensity values (e.g. in W/m2) using at least 16 bits per component, possibly using floating-point. The lack of gamma correction means that the brightest parts of the scene (i.e. light sources) have much higher values than the average.

Once the complete scene has been rendered, bloom is applied by adding a faint, blurred copy of the image to the original. The faintness means that the effect is only noticeable in areas of the image which are adjacent to much brighter areas.

The final HDR render is then converted to an 8-bit gamma-corrected version using tone mapping.

Note that HDR rendering requires either that sRGB textures (which includes most “image” textures) are declared as such (by using e.g. GL_SRGB8 or GL_SRGB8_ALPHA8 as the internal format) or that explicit gamma conversion is performed on the values read from them (the former is preferable, as it allows filtering to be performed correctly).

[QUOTE=GClements;1280776]Bloom is normally implemented as a post-process effect using high dynamic range (HDR) rendering.

With HDR, rather than the framebuffer containing gamma-corrected brightness values with 8 bits per component, it contains linear intensity values (e.g. in W/m2) using at least 16 bits per component, possibly using floating-point. The lack of gamma correction means that the brightest parts of the scene (i.e. light sources) have much higher values than the average.

Once the complete scene has been rendered, bloom is applied by adding a faint, blurred copy of the image to the original. The faintness means that the effect is only noticeable in areas of the image which are adjacent to much brighter areas.

The final HDR render is then converted to an 8-bit gamma-corrected version using tone mapping.

Note that HDR rendering requires either that sRGB textures (which includes most “image” textures) are declared as such (by using e.g. GL_SRGB8 or GL_SRGB8_ALPHA8 as the internal format) or that explicit gamma conversion is performed on the values read from them (the former is preferable, as it allows filtering to be performed correctly).[/QUOTE]

Thanks you very much for the explanation ,
As i understood the technique i used is correct, what i have to do now is like “Screen Shoot” As texture in the memory for each frame in my final 3D Scene and then render upon it with the bloom effect ?

[QUOTE=stavbodik;1280778]
As i understood the technique i used is correct, what i have to do now is like “Screen Shoot” As texture in the memory for each frame in my final 3D Scene and then render upon it with the bloom effect ?[/QUOTE]
Realistically, you need to render the scene into a texture rather than directly the default framebuffer (i.e. window). The framebuffer needs enough precision to store linear (non-gamma-corrected) intensities and enough range not to have to clamp emissive surfaces (e.g. the surface of a lamp should be something like a thousand times brighter than a brightly-lit white wall).

If you try to apply bloom to a gamma-corrected and clamped sRGB image, you typically won’t be able to distinguish between bright surfaces and (much brighter) light sources, although only the latter should produce a noticeable bloom.

[QUOTE=GClements;1280781]Realistically, you need to render the scene into a texture rather than directly the default framebuffer (i.e. window). The framebuffer needs enough precision to store linear (non-gamma-corrected) intensities and enough range not to have to clamp emissive surfaces (e.g. the surface of a lamp should be something like a thousand times brighter than a brightly-lit white wall).

If you try to apply bloom to a gamma-corrected and clamped sRGB image, you typically won’t be able to distinguish between bright surfaces and (much brighter) light sources, although only the latter should produce a noticeable bloom.[/QUOTE]

Thanks you again, I have got in trouble when trying to achieve same effect on scene with light.
Before the bloom effect I want to ensure that my render to texture works.
Unfortunately I am getting some “NOISE” on results, may you please tell me what am I doing wrong?

The “NOISE” can be seen as black pixels/ UI components/old rendered texture
on the rendered texture inside the frame buffer (not the default one )
Its seems like the shader buffer wont get cleared or something :

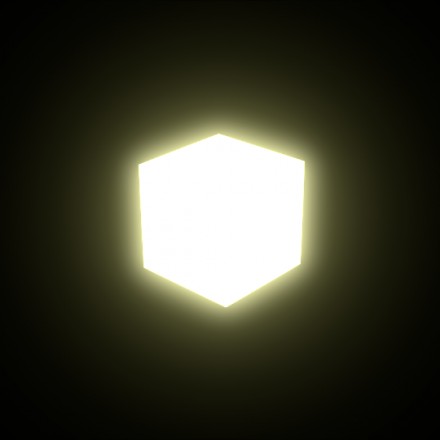
http://s8.postimg.org/6fvrrgtsl/glsh.png

This is the fragment shader I use:

precision mediump float;       	// Set the default precision to medium. We don't need as high of a 
								// precision in the fragment shader.
uniform vec3 u_LightPos;       	// The position of the light in eye space.
uniform sampler2D u_Texture;    // The input texture.


varying vec3 v_Position;		// Interpolated position for this fragment.
varying vec4 v_Color;          	// This is the color from the vertex shader interpolated across the 
  								// triangle per fragment.
varying vec3 v_Normal;         	// Interpolated normal for this fragment.
varying vec2 v_TexCoordinate;   // Interpolated texture coordinate per fragment.


// The entry point for our fragment shader.
void main()                    		
{         
     
	// Will be used for attenuation.
    float distance = length(u_LightPos - v_Position);                  
	
	// Get a lighting direction vector from the light to the vertex.
    vec3 lightVector = normalize(u_LightPos - v_Position);              	

	// Calculate the dot product of the light vector and vertex normal. If the normal and light vector are
	// pointing in the same direction then it will get max illumination.
    float diffuse = max(dot(v_Normal, lightVector), 0.0);               	  		  													  

	// Add attenuation. 
    diffuse = diffuse * (1.0 / (((0.5)*(distance))));
    
    // Add ambient lighting
    diffuse = diffuse + 0.6;  

	// Multiply the color by the diffuse illumination level and texture value to get final output color.
    gl_FragColor = (v_Color * diffuse * texture2D(u_Texture, v_TexCoordinate));  

}                                                                     	


Here is the frame buffer installation code(frame dimensions 1250^2) :

public int InitiateFrameBuffer(int fbo, int tex, int rid)
    {
            //Bind Frame buffer 
            GLES20.glBindFramebuffer(GLES20.GL_FRAMEBUFFER, fbo);
                  
            //Bind texture
            GLES20.glBindTexture(GLES20.GL_TEXTURE_2D, tex);
            //Define texture parameters 
            GLES20.glTexImage2D(GLES20.GL_TEXTURE_2D, 0, GLES20.GL_RGBA,frameWidth, frameHeight, 0, GLES20.GL_RGBA, GLES20.GL_UNSIGNED_BYTE, null);
            
            GLES20.glTexParameteri(GLES20.GL_TEXTURE_2D, GLES20.GL_TEXTURE_WRAP_S, GLES20.GL_CLAMP_TO_EDGE);
            GLES20.glTexParameteri(GLES20.GL_TEXTURE_2D, GLES20.GL_TEXTURE_WRAP_T, GLES20.GL_CLAMP_TO_EDGE);
            GLES20.glTexParameteri(GLES20.GL_TEXTURE_2D, GLES20.GL_TEXTURE_MAG_FILTER, GLES20.GL_LINEAR);
            GLES20.glTexParameteri(GLES20.GL_TEXTURE_2D, GLES20.GL_TEXTURE_MIN_FILTER, GLES20.GL_LINEAR);
            //Bind render buffer and define buffer dimension
            GLES20.glBindRenderbuffer(GLES20.GL_RENDERBUFFER, rid);
            GLES20.glRenderbufferStorage(GLES20.GL_RENDERBUFFER, GLES20.GL_DEPTH_COMPONENT16, frameWidth, frameHeight);
            //Attach texture FBO color attachment
            GLES20.glFramebufferTexture2D(GLES20.GL_FRAMEBUFFER, GLES20.GL_COLOR_ATTACHMENT0, GLES20.GL_TEXTURE_2D, tex, 0);
            //Attach render buffer to depth attachment
            GLES20.glFramebufferRenderbuffer(GLES20.GL_FRAMEBUFFER, GLES20.GL_DEPTH_ATTACHMENT, GLES20.GL_RENDERBUFFER, rid);
            
            //rest
	        GLES20.glBindTexture(GLES20.GL_TEXTURE_2D, 0);
	        GLES20.glBindRenderbuffer(GLES20.GL_RENDERBUFFER, 0);
	        GLES20.glBindFramebuffer(GLES20.GL_FRAMEBUFFER, 0);
            
            System.out.println(GLES20.glCheckFramebufferStatus(GLES20.GL_FRAMEBUFFER));
            
            return tex;
    }

Installation of view port :


@Override
	public void onSurfaceChanged(GL10 glUnused, int width, int height) 
	{
		width=1250;
		height=1250;

		// Set the OpenGL viewport to the same size as the surface.
		GLES20.glViewport(0, 0, width, height);

		// Create a new perspective projection matrix. The height will stay the same
		// while the width will vary as per aspect ratio.
		final float ratio = (float) width / height;
		final float left = -ratio;
		final float right = ratio;
		final float bottom = -1.0f;
		final float top = 1.0f;
		final float near = 1f;
		final float far = 1000.0f;

		Matrix.frustumM(mProjectionMatrix, 0, left, right, bottom, top, near, far);
	}	

Config i use :


GLES20.glEnable(GLES20.GL_DEPTH_TEST);
        GLES20.glDepthFunc(GLES20.GL_LEQUAL);
        GLES20.glFrontFace(GLES20.GL_CCW);
        GLES20.glEnable(GLES20.GL_CULL_FACE);
        GLES20.glCullFace(GLES20.GL_BACK);

I am using power of 2 frame buffer size , before drawing i am binding the created frame buffer
Then i draw inside it the sphere .
Next step i return to default frame buffer and trying to draw the rendered texture to simple quad mesh .
W/O frame buffer the results of the sphere texture are O.K .

You’re unbinding the FBO before calling glCheckFramebufferStatus(), meaning that it’s checking the default framebuffer, which is always complete.

But that probably isn’t related to the noise issue. Are you calling glClear(GL_COLOR_BUFFER_BIT|GL_DEPTH_BUFFER_BIT) after binding the FBO? You probably don’t need to clear the default framebuffer before rendering the FBO texture onto it, but you should disable depth tests for that step.

Also, OpenGL ES doesn’t require support for any high-precision texture formats, which is going to make it hard to do a reasonable bloom effect.

[QUOTE=GClements;1280809]You’re unbinding the FBO before calling glCheckFramebufferStatus(), meaning that it’s checking the default framebuffer, which is always complete.

But that probably isn’t related to the noise issue. Are you calling glClear(GL_COLOR_BUFFER_BIT|GL_DEPTH_BUFFER_BIT) after binding the FBO? You probably don’t need to clear the default framebuffer before rendering the FBO texture onto it, but you should disable depth tests for that step.

Also, OpenGL ES doesn’t require support for any high-precision texture formats, which is going to make it hard to do a reasonable bloom effect.[/QUOTE]

Amazing !!! i were trying to fix it for couple days WoW !
Thanks you very much !

Clearing the color/depth buffer bit for the new frame buffer done the job ! Going to try now to apply the bloom effect , Thanks !

I have added the bloom + blur effect (:
Result :

http://s18.postimg.org/oo3e9jcp5/resblm.png

Now what left to do is to draw the same Mesh with texture 2 PI times around the y axis .

But I still have problem , some how if i translate this Mesh with texture lets say to 1,0,0
So the mesh that drawn inside this Mesh (which is same pointer(the one that FB holds)) , is translated 2 .

I will describe the procedure I am doing :

  1. draw the 3d sphere on first FB.
  2. take texture from first FB and draw it on Mesh inside second FB with horizontal blur+adding bloom.
  3. take texture from second FB and draw it on same Mesh inside third FB with vertical blur+adding bloom.
  4. back to default FB
  5. take texture from third FB and draw it on same Mesh and translate .

I have tried to draw the texture from step 5 to new Mesh pointer but unfortunately its wont show ):

I will add here the source for Mesh And Sphere

http://www.filedropper.com/mesh
http://www.filedropper.com/sphere

Thanks again , idk how to thanks u…

BTW I Just realized that rotating this mesh 2PI times wont get for me the effect i wanted,
Maybe i have to make the bloom+blur effect on all sphere triangles ?
So the final result its will shine like this :

But as sphere ?

Amazing it works!

https://vid.me/9tcz

So for those who want to achieve same effect that took me about week to understand what i want ^^
I have added the source files :

http://www.filedropper.com/mesh
http://www.filedropper.com/sphere

The last trick is to render the texture exactly where the sphere is then using :


GLES20.glBlendFunc(GLES20.GL_ONE,GLES20.GL_ONE);
GLES20.glEnable(GLES20.GL_BLEND);
GLES20.glBlendColor(0, 0, 0, 0);
        // draw


GLES20.glDisable(GLES20.GL_BLEND);
GLES20.glDepthMask(true);
GLES20.glEnable(GLES20.GL_DEPTH_TEST);

and then playing with the blur scale (:

it is not done yet , hope i wont have more questions
Thanks you GClements !!!